Pages

April 6, 2018

New Look 6892 Smock Blouse

イギリス駐在期間が5月末まで伸びました。まだその後どうなるのかは全く未定。1か月ごとに延長されるよりはよし。そんなわけでオンラインショッピングで新しい布注文。
ブラウスを作りました。
型紙は以前使ったニュールックの6292番。
布は木綿にちょっとライクラが入って伸びがあるシアサッカー。
出来上がった感想は、あれだね、保育所のスモックを着ている気分。袖のあたりが特に。


The Man of the House's expat contract got extended (again) until the end of May, so I bought some new fabric and I made a peasant style blouse.


The pattern is New Look 6892. I used it twice before.
This time, I made View A, the long sleeve version.


The fabric is navy blue cotton/Lycra seersucker with black stripes.


I cut a size 10 and made the following modifications:
-Shortened the bodice by 1" (but then ended up shorter than I wanted so I used 3/8" hem to compensate).
-Lowered the center front by 1.5".
-Cut the sleeve at the casing line to omit the cuff ruffles.
-Added ties to contain the back bagginess.
-Narrowed sleeves at the elbow.


I wanted to have a sort of bishop sleeve. Below is my modified sleeve pattern on top of the original. I kept the original raglan line, then narrowed about 2" each side at the elbow (View B line), then flared it back out. I think my intention was good, but the fabric was a bit too stiff to have a "poof" that I waned and the cuff gather is a bit too bulky.


I do not like the pattern's wide neck design, and I am basically using a shorter neck elastic to bring the sleeve up near my neck. But I can definitely feel the pulling of the sleeve and I think I will have to add some more shoulder coverage on the pattern itself to be 100% comfortable to wear.

There is also too much fabric in the back. I should have followed the adjustment I did last time by taking in at CB to reduce the width of back bodice.

The fabric was much stiffer than I expected. I hope a few cycles of laundry will soften it up a bit. The color and the shape of the blouse really reminds me of my daycare smock, which was a uniform that every kid had to wear over regular clothes (with a tulip shaped name badge). Yeah, I was once a cute 5 year-old day care girl.

April 2, 2018

No Frills Leggings: McCall's M6360

イギリスの冬は寒い。冬が観光シーズンな砂漠地帯に長く住んでいたおかげで、皮膚弱くなったな。
そんな寒い冬の間に、オット用にババシャツを作ったんだけど、そのあまり布で自分用に股引作りました。レギンスとかステキな名前で呼ぶようなものではなく、寒い時にズボンの下に履く用です。
レーヨンのニットで作りました。型紙はマッコールというブランドのM6360番です。
ヨガのポーズをしようかと思ったけど、全然バランス取れませんでした。


My clothes were not equipped to stand against British winter chill. My "winter clothes" in the desert South West mainly consisted of 3/4 sleeve cardi and cami under it. That's more like a summer clothes here in England.


I have 1 pair of long johns, and that pair has been worn continuously throughout the winter, so I needed to add another pair. I bought 2 meters of rayon jersey to make a long sleeve T-shirt for the Man of the House, and I was able to squeeze in a pair of long johns for me.


The pattern is McCall's M6360, leggins pattern.
I made a View E, the mid-calf length. The design calls for a zipper at the hem but I omitted it.


Because the fabric is very drapey and has a lot of stretch, while my body measurements suggested I was size 12 to 14, I cut a size 6. I was aiming for a second skin leggins to wear under jeans so I did not want any ease or looseness.


I shortened 2" around mid-thigh (I am 5'3"), and I also ended up shortening another 2" at the hem. This additional 2" shortening is probably because of the fabric stretch and negative ease than pattern length. (Though the envelope model has pretty long legs...)

It was very easy to make and I am very happy with the result. Also, it was a perfect project to get used t to my new serger.

(Worn together with Simplicity 1916 top.)


March 25, 2018

Bought a Serger: Juki MO-734DE

3月ももう数日で終わるというのに、未だにイギリスでの滞在期間不明です。
なんかもういつまでいるのかとか考えて行動するのが面倒くさくなったので、中古のロックミシン買いました(爆)先月ロックミシンが壊れてから、ずっとどうしようか考えていたのです。最大の難点は、イギリスとアメリカでは電源の圧力が違う(コンセントの形も違う)ということ。でもアメリカから持ってきたミシンも変圧器使って普通に使えてるし、そんなこと思ってたら、アメリカに帰ったら買おうと思ってたモデルの上のモデルの中古がEbayに出てて、オークションで買ってしまった。

買ったのはJukiのMO-734DEというモデルで(日本では多分MO-344Dというモデル)、もう製造事体は中止されてるんだけど、中古とは言えほとんど使ってない状態で、付属品もたくさんついてて(どれも未使用だし)、かなりお得でした。
でもさ、ロンドン南部まで取りに行くのが1日がかり。
もうどこ行っても渋滞で、1時間15分ぐらいで着くはずが片道3時間もかかったわよ。
フェリーでテムズ川渡ったわよ。
片道3時間もかけて(帰り道も3時間かかった)行って、あまりいい状態の中古じゃなかったらどうしようと思ったけど、6時間かけた価値あったと思う。よかった。(運転手のオットにちょっと申し訳なかった)


It is almost the end of the month and we still do not know if we are moving back to the US or not. I am so tired of thinking or planning the move at this point, so if I need a detergent and it's on sale at the store if I get 2 bottles, I am going to buy 2 bottles.

On that same note, I bought a serger.

My Brother 1034D has been out of order for a month now. It broke down early last year and the timing has been ever slightly wrong. It was still sewing just fine, then it went completely wrong.

I was planning on buying a Juki MO-654DE when I get back to the U.S. I have enough Amazon gift certificate to cover the cost so it's like free for me. Then, I saw a listing of this used MO-734DE on Ebay... And it appeared to be a pretty good deal...

I hesitated first, because the thing about buying a new machine in UK is that the voltage is different and the power socket is different. But then, I can totally use the UK machine with a voltage converter in the US...

So I bit the bullet and bid on the auction, and I won (at the last 2 seconds of the auction)!

Well, that meant I had to go to Bromley to collect it. Bromley is in the southern part of the greater London area. I allotted 1.5 hours of driving to Bromley, but it ended up taking 3 hours each way, thanks to congestion everywhere in London. I felt bad for MOTH who was driving, but at least we got to get on a ferry to cross River Themes.


So, the serger.

I worried a bit for getting a lemon since the Ebay listing did not have much description and I'm always weary about Ebay sellers. But I think I got a good working machine. The lady who was selling it was moving and she had sewing machine and a coverstitch machine for auction as well.

I tested it at her house. I kind of winged it on the threading but it totally worked (the lady did not even know how to thread it). And oh, how well it sewed!


The machine came with a carrying case, 6 spools of thread, all the accessories including a brand new packet of needles which I assume came with the machine when she bought it. And 6 additional feet. The lady was a bit embarrassed that she only used the machine for 1 project and never even opened or used the accessories.


The machine was cheaper than a brand new Brother 1034D, and so far, I am just amazed how smooth it sews compared to 1034D. It's a discontinued model but I have heard all good things about Juki so let's hope it will last for a long long time. I am very excited at my new (used) serger!

March 18, 2018

Liberty Shirt #3: Butterick B5526

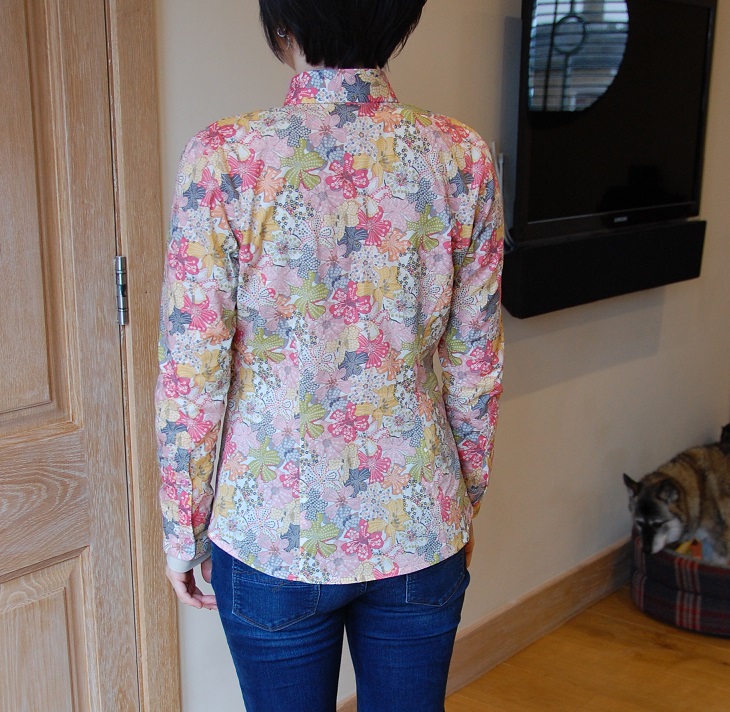
もう水仙が咲き始めたというのに雪が降った土曜日だったので、一日裁縫に励みました。リバティタナローンを使ったシャツ3枚目。型紙は毎度のことながらバタリックの5526番。もう飽きたとは言わせませんわっ。
今回は、肩の傾斜角度を変えてみたら、鎖骨当たりがサクッとはまってくれて、今まで続けてきた型紙の微調整の中でも一番きれいに収まったと思います。今後はもう調整しなくていいぐらい。

ちなみに近況報告をすると、オットの駐在勤務の契約が3月末で切れるというのに未だに今後の予定不明(泣)本来は2月末で切れる契約をすでにひと月更新していて、それでも未決定ですよ。もう1年とどまるのか帰るのか、どっちでもいいから早く決めてほしいです、会社よ。


Daffodils have started to bloom but the Beast from the East II brought snow again so I spent all day on Saturday sewing.

The pattern is, once again, Butterick B5526. I know it's bee the same pattern over and over and it gets kind of boring. But let me tell you something (or let me complain): MOTH's expat contract is until the end of March. It was already extended for a month last month. We still do not know whether we are staying another year or we are going back to the U.S. So I don't really want to buy more stuff or take on a whole new project if I have to pack it all up in a couple of weeks. (Plus the serger is still out of order...) That's why I'm sticking to my stash, which gives me limited things to make. But shirtmaking is very satisfying so I can't complaint about that.


Anyway, this is my Liberty tana lawn shirt #3. I picked the pink-ish print to represent my spring mood. The print is called "Mauvey."


I made a princess seam version with long sleeve and followed some my previous pattern alterations:
-Size 10.
-Use Sewaholic Granville shirt sleeve/cuff/tower placket pattern for a slimmer sleeve and wider cuff.
-Rounded the corner of the cuff.
-Shaved 1/2" at the tip of collar.
-Shortened bodice 1" (I am 5'3").


In addition, I added the following alterations:
-Shaved the outer edge of the collar 1/8".
-Square shoulder adjustment by raising the end of shoulder by 3/8" and raised the underarm by 3/8".
-Took in 3/8" at the bottom of the front princess seam (both front and side front seam where the pencil is pointing in the picture below) to reduce the flare.
-Lower the sleeve cap by 1/2" to reduce ease (and it made no ease at sleeve cap and no need to do ease stitch).


I'm very happy now that the front bodice does not stick out too much (but still enough ease to comfortably sit down and eat a full dinner).


But what I'm most excited about is the effect of the square shoulder adjustment. I mentioned in my last post that the upper chest area right below the collar is collapsing. It's been that way for my other iteration of this pattern but the more I refine the fit, the collapsing became more noticeable. And raising the shoulder angle by 3/8" made all the difference. Now I can apply this alteration to dress patterns so I won't have gaping neck line anymore.


Last time I forgot to top stitch the collar and cuffs so this time I made sure to do that.


Hard to see but this is the flat felled seam over the princess line. Not perfect but getting better at it.


The only regret that I have with this shirt is that I did not do any pattern matching. I did not even think I would need to do pattern matching or need to be mindful of pattern placement because the print is all over. However, now that I'm looking at the photo, the gray flowers in the print really stick out. It was pure luck that the gray flowers are falling somewhat symmetrical but that makes it all the more noticeable.


Well, that pattern placement aside, this is the best fit among all the B5526 I made and I think this is "it." No more pattern tweak. This is my TNT final version.

March 5, 2018

Fleece Projects: Fleece Beanie & Neck Warmer

もう3月だというのに、先週はすごい寒波に襲われて、日中の最高気温が零下な日が続きました。夜の散歩はブリザード状態で、零下7度ぐらい(風のおかげで体感気温はそんなもんじゃなかった)で、おそらく人生で一番寒い日々だったと思う。そんなでもさ、向かいの牧場に放し飼いにされてる馬たちはフツーに雪を鼻でのけながら草食べてたよ(夜でもね)。

ものすごい寒いおかげで毎日降る雪がパウダースノーだったので、これまた人生で初めて、雪を掃いた。シャベルいらず(っていうかシャベルないから)。デッキブラシで掃いた。

週末になってあったかくなったので、もう雪もとけたし、気温も4度ぐらいまであがったんだけど、まだ気分は真冬だったので、フリースのあまり布でネックウォーマーと帽子を作りました。


I had the coldest days in my life when the Beast from the East hit England. Having been grown up in the snow country, snowing doesn't surprise me. (Though, having living in the desert for 10 years, I do get excited when it snows) But being able to "sweep" the snow with a push broom was a totally new experience to me. Yey to the power snow.


The temperature has come up above freezing over the weekend and all the snow has already melted, but since I was still having the blizzard mentality, I made some fleece beanie and neck warmer.


I watched "Sewing with Fleece" class on Craftsy while the Craftsy Unlimited was free over the weekend, and used the beanie pattern from the class. Very simple pattern and it took very little time to finish.


Since I could not use my serger to finish the raw edges, I used a decorative stitch on my sewing machine to top stitch the seam line and to secure the hem. It almost worked like cover stitch and the seams are nicely compressed.


I originally planned to make a fleece scarf next, but my left-over fabric did not have enough width to cut a continuous long scarf, so I made a neck warmer instead.


It's just a rectangle, 26 inches wide by 22 inches tall, with 2 layers sewn together and top-stitched.


One corner attaches to the diagonal corner with 2 snaps. I added fake leather buttons to cover the snaps. The buttons are fake as in it's not leather, and they are also fake as in it's purely decorative and not a functional button. I also have only 2 snaps, but added 3 buttons because 3 buttons looked better than 2.


I wore them to walk the dogs and thanks to the generic, non-technical fleece property, I got very hot at the neck and had to unzip my jacket.

I am still searching a good source to get technical fleece fabric (like Polartec) in England. Well, it's non-existent. Some online shops do sell "some" but I am lucky if I see more than 1 color (usually navy or gray). They don't even describe the thickness (like Polartec 100, or 200, etc). What do British sewers do when they want technical fleece fabric??? Why aren't there any Seattle Fabrics type shops in England???

March 4, 2018

Liberty Shirt #2: Butterick B5526

壊れたロックミシンを放置しているので、引き続きロックミシン無しでできるシャツ作り。シャツ作りって、けっこうハマる。
布は前回のリバティに引き続き、閉店セールで買ったリバティタナローンを使いました。
型紙も全く同じバタリックの5526番。(微妙にサイズ調整はしている)
なんかジーパンのモモがパツパツに見えるけど、下に股引履いてるからね(笑)


Since my serger is still out of order, I am continuing my sewing endeavor with a woven project and made another Liberty shirt from my precious Liberty I bought at the local fabric store's closing sale.


The pattern is, again, Butterick 5526, with the princess seam version.


I used the flat fell seam finish for shoulder, princess seam, armscye, and underarm-side seam. Not perfect around bust area and shoulder curve but getting better.


Just like the previous Liberty shirt, I cut a size 10, and used Sewaholic Granville Shirt pattern as a guide and adjusted the sleeves and cuffs. I also used the tower placket piece from Granville. The bodice is shortened 1" (I am 5'3").


I narrowed the collar and collar stand pieces in my last shirt, but I put them back to its original size this time, and just shaved off the corner of the collar piece (the shaded part where the pencil is pointing in the photo below).


Although this is my 4th princess seam version of this pattern, I am still tweaking the patterns here and there. It feels like the more I get right, the more I notice something wrong. One thing I have to change now is the bottom of the front bodice. Yes, my belly sticks out, but the shirt also sticks out. This has been the case for all my previous shirts from this pattern but I have neglected to adjust this part for some reason.

The other major flaw in the fit is the front neck area. It's collapsing. It had been that way for my other shirts from this pattern and I always thought my collar stand was not attached right or my button placement was wrong. But I think I now know what it is: my square shoulder. Why is my fitting adjustment never simple?


I think I got used to the shirt making process and had too much confidence in myself. The result is that I totally forgot to top stitch the collar and the edge of the front button placket. Note to myself: always be humble and read the instruction.


The original cuff pattern is a one-piece cuff where you just fold it in half to create a cuff. I wanted a round corner so cut made the pattern piece into 2 and slightly round the corner.

I really like the tower placket, though you can barely see it.

Oh, by the way, I totally used flower shaped buttons. Too juvenile for a 40-year-old? Nah.


I really really like this print. However, I was very disappointed in it that when the fabric was pressed, the color faded. Originally, the background navy was deeper and it had such vibrant contrast with salmon pink flowers, but it all faded somewhat gray-ish.

Shirtmaking is very addictive. I really like it when everything fits (not on the body but sewing-wise) into place perfectly and how fabric lives up when it's pressed and clapped.

February 18, 2018

Road to Liberty Shirt: Granville to Butterick B5526

ここのところぐうたらな日が続いてYouTubeばかり見て過ごしていましたが、重い腰をあげて放置していたシャツを作り終えました。
ほっぽってた割に、出来栄えには大満足です。
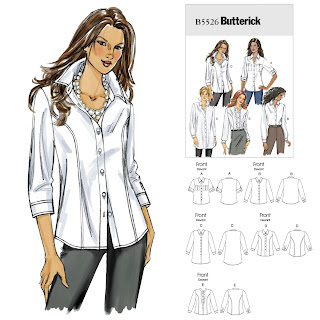
型紙はもう何回も使っているバタリックのB5526番
布はリバティ社の木綿タナローンです。高級品なのよ~。地元の布屋さんの閉店セールで15%オフでゲットしました。(それでも高級)5種類、2メートルずつ買った中の一つ。


Back in September, a fabric/yarn shop in the nearby town was closing down and having a 15% off everything sale. I had only been there a couple of times, but knew they had a shelf of Liberty fabric so I went down there and bought these 5 prints, 2 meters each. That was a lot of money even with the sale price, but I wanted to get some Liberty while I was in England (when in Rome, right?), so it was a perfect opportunity.


After my fleece jacket, I wanted to start a new sewing project but did not want to buy new fabric because I wasn't sure if I was moving back to the U.S. soon (and still don't know...), so I decided to make a shirt with my precious Liberty stash.

I bought Sewaholic Granville Shirt pattern. I like Sewaholic patterns and I really like all the bells and whistles of traditional shirt components in Granville.

However... Argh, my toile did not go so well. In addition to the sleeve length being too long, the shoulder was too wide, neck too tight, back neck too high and gaping like crazy, cross front too tight, sleeve does not hung right, and my usual sway back.

It needed too many adjustments and would have needed multiple mock-ups, so I gave up. But I really did like the design of Granville.


So I decided to use my Butterick B5526 shirt pattern (princess seam version) and incorporated some of Granville.


At this point, I had made 2 iterations of princess seam version (navy blue and gingham). There were many traced pattern pieces with different size/adjustments mixed up in my manila envelope where I keep all of B5526 traced pattern pieces (I also made 2 iterations of dartless version as well), so I started anew from tracing the pattern pieces from scratch.


I cut a size 10 and shortened the bodice by 1". For the collar and collar stand, I shortened the height of both by 1/4".

One thing I did not like about this pattern was the sleeve. It's so loose but tight at the cuff. Also it only had bias bound sleeve placket instead of a tower placket.

One thing I really liked about Granville was the sleeve (aside from it being too long). It is slimmer fit with no pleats at the cuff. the below photo is the size comparison. The traced Butterick sleeve pattern (size 10) with Granville (size 6) on top. I kept the shoulder curve then merged to Granville sleeve width. The modified sleeve pattern piece is 1" shorter than the original.


I lengthened the cuff piece to match the sleeve (though sleeve pieces is modified to be narrower, with no pleats, Granville is wider at the cuff) and used the Granville's tower placket piece. I like the wide cuff opening: it goes over my rather chunky watch (Baby G).


Before I started sewing, I re-watched the 2 Craftsy shirt making classes: Janet Pray's "Sew Better Sew Faster: Shirtmaking" and Pam Howard's "Classic Tailored Shirt." While the two classes have very different methodology, both classes have been very valuable to me.


I was going to mock-flatfell the inside seams, finishing the seams with serger and topstitching it down, but then my serger broke... :( The timing went completely wrong and I just don't know what to do. Anyway, without the serger, I was forced to finish the seams with sewing machine so I manned up and did the real flatfelled finish. I guess it's worth putting that extra effort for a pricey Liberty fabric.


I used "pro-woven shirt crisp" interfacing from Fashion Sewing Supply for the outer collar and cuff and "pro-sheer Elegance light" for collar and cuff facing. I thought the "shirt crisp" was too heavy for this tana lawn while I was sewing, but I'm glad I stuck to it. I think I like crisp collar and cuff (as long as they are not too tight).


I will put the collar and collar stand pattern to their original size next time. I still have bit of a wrinkle at the upper bust coming out of the arm hole and the sleeves are wrinkly, but I can live with them; it's beyond my pattern alteration skill plus I hate fitting and adjusting.

I think I will go ahead and make another Liberty shirt next since my serger is out of order.