布は前回のリバティに引き続き、閉店セールで買ったリバティタナローンを使いました。
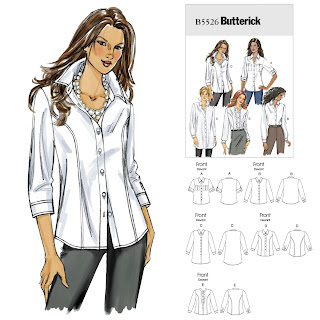
型紙も全く同じバタリックの5526番。(微妙にサイズ調整はしている)
なんかジーパンのモモがパツパツに見えるけど、下に股引履いてるからね(笑)

Since my serger is still out of order, I am continuing my sewing endeavor with a woven project and made another Liberty shirt from my precious Liberty I bought at the local fabric store's closing sale.

The pattern is, again, Butterick 5526, with the princess seam version.
I used the flat fell seam finish for shoulder, princess seam, armscye, and underarm-side seam. Not perfect around bust area and shoulder curve but getting better.

Just like the previous Liberty shirt, I cut a size 10, and used Sewaholic Granville Shirt pattern as a guide and adjusted the sleeves and cuffs. I also used the tower placket piece from Granville. The bodice is shortened 1" (I am 5'3").

I narrowed the collar and collar stand pieces in my last shirt, but I put them back to its original size this time, and just shaved off the corner of the collar piece (the shaded part where the pencil is pointing in the photo below).

Although this is my 4th princess seam version of this pattern, I am still tweaking the patterns here and there. It feels like the more I get right, the more I notice something wrong. One thing I have to change now is the bottom of the front bodice. Yes, my belly sticks out, but the shirt also sticks out. This has been the case for all my previous shirts from this pattern but I have neglected to adjust this part for some reason.
The other major flaw in the fit is the front neck area. It's collapsing. It had been that way for my other shirts from this pattern and I always thought my collar stand was not attached right or my button placement was wrong. But I think I now know what it is: my square shoulder. Why is my fitting adjustment never simple?

I think I got used to the shirt making process and had too much confidence in myself. The result is that I totally forgot to top stitch the collar and the edge of the front button placket. Note to myself: always be humble and read the instruction.

The original cuff pattern is a one-piece cuff where you just fold it in half to create a cuff. I wanted a round corner so cut made the pattern piece into 2 and slightly round the corner.
I really like the tower placket, though you can barely see it.
Oh, by the way, I totally used flower shaped buttons. Too juvenile for a 40-year-old? Nah.

I really really like this print. However, I was very disappointed in it that when the fabric was pressed, the color faded. Originally, the background navy was deeper and it had such vibrant contrast with salmon pink flowers, but it all faded somewhat gray-ish.
Shirtmaking is very addictive. I really like it when everything fits (not on the body but sewing-wise) into place perfectly and how fabric lives up when it's pressed and clapped.
No comments:
Post a Comment