先日の
チュニック丈のシャツをまたしても改造して、ピンタックなスタンドカラーチュニックシャツを作りました。
ピンタックが完ぺきではないけど、私のレベルでは上出来だということにしておく。
フリルもつけてみたりして。
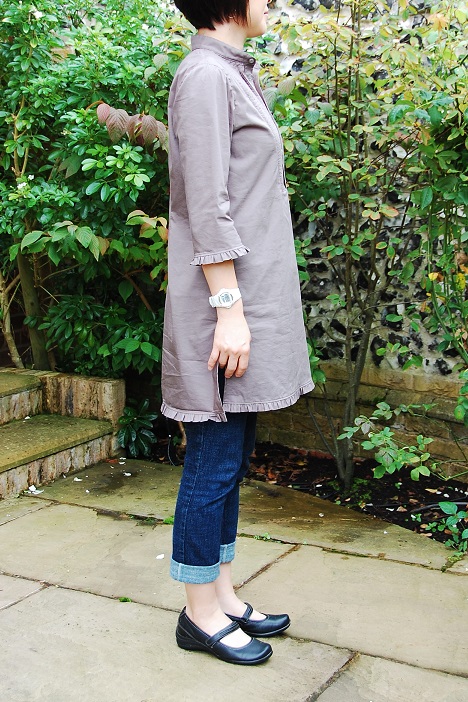
I originally intended to enter my last
Butterick B5526 tunic hack for the
Tunic Contest on Pattern Review. However, the final garment wasn't quite "tunic" in my opinion; it was more of a shirt that was tunic length.
After Google image searching tunic photos, I realized that what was needed for the shirt to look properly "tunic" was the bib or some trimming around the front placket. So I decided to attempt a pin-tucked bib, and this is what came out. Obviously, I did not finish it before the contest deadline so this was more like a contest sew-along.
The pattern is
Butterick B5526, a shirt pattern. I used the view C, the long shirt version as my base. I cut a size 12 this time, and the shoulder came out a bit too wide. I also shortened the bodice by 2" at the hem.
I cut the front bodice on fold and added the bib, omitted the collar and cuffs, and added frills on sleeve hems and bodice hems. Hems are also cut straight again and I added the side slit. The back was terribly baggy, so I added fish-eye darts.
The fabric is the same gray fabric I used for my last tunic hack. It is a cotton/Lycra blend J.Crew shirting.
My Janome 6600 did not come with a pin tuck foot and I did not a narrow twin needle, so I had to sew the tucks manually, every single tuck, 60 times. Now that I think of it, I could have used my cover stitch machine to create pin tucks. Well, too late now.
So this is how I manually did it.
I cut the fabric and drew vertical lines 1/2" apart with a Frixion pen on the wrong side of the fabric, which made a thin white scoring lines on the right side of the fabric.
I finger-pressed the fabric at the scoring line and sewed about 1/8" from the folded edge, 60 times.
Once I sewed enough tucks, I cut cut out the bib piece.
Unfortunately, I cut out the bib upside down, so it ended up with the crooked side. Oh well.
The front placket is a separate piece. I used view D/E placket pattern and shortened it for the length of the bib.
It is neither a perfect bib nor perfect pin tuck, but for a first time attempt, I think I nailed it.
I recently bought a button foot and used it for the first time on this shirt. To be honest, I don't need a special foot. I can sew buttons using the open toe foot that came with the machine. But I was putting an Amazon order and needed a filler (because I don't have a Prime account for UK Amazon). It's less than $2, so why not?
I secure the button with a scotch tape then add a couple of pins between the button and the foot (I don't have a tooth pick at the moment so making do with 2 pins) so that the buttons are not sewn too tight on the placket.
The sleeves and the hems have frills. I cut the fabric 1.5 times the length of the hem and gathered them. I am not really good at distributing the gathers.
At the end, it resembles more of a Victorian nightgown than a tunic, but well, it came out pretty close to what I imagined.