Pages

May 31, 2017

Becoming Zoe 4: Jalie 2680

ファイアーフライ宇宙大戦争、ゾーイのコスプレ最後の衣装はコートです。

型紙はカナダの会社、Jalieの2680番

寒いかと思ってコートまでコスプレの衣装に加えたんだけど、とってもいい天気で会場に行くまでと帰り道以外必要なかった。
ボタンホールが一番難しかったです。
ゾーイの衣装、これで完成。1か月で4つも縫った。ものすごい達成感。
ちなみに帰り道この格好でインド料理屋さんに夕ご飯食べに行った(爆)


My Zoe costume was completed with a coat.
When I originally planned my costume, it was still cold so I thought I would need a coat. The weather on Saturday turned out to be pretty nice and hot in the sun, so I only wore the coat for a brief period of time, mainly to and from the venue.


The pattern is Jalie 2680, City Coat pattern. It is kind of funny that out of 4 garment pieces I made for this costume, other than the self-drafted vest, the rest were all made out of Jalie. Who would have thought that the Jalie patterns, patterns for figure skaters and gymnasts, could be used for cosplay.

I bought a PDF pattern, and this was my first layered PDF pattern. It is brilliant. So easy to cut the pattern.

The pattern calls for stretch woven, so I bought this very beefy stretch cotton drill. I do not know how much Lycra in it, but it is VERY stretchy. And it has a 4-way stretch. First time using a 4-way stretch woven fabric. I could not stop thinking this would be the perfect fabric for Eleonore.


The original pattern is unlined, but I lined it with Bemberg rayon. I watched Sara Alm's Craftsy course, "Mastering Construction: Facings & Linings" for drafting the lining patterns and sewing technique for bagged lining.


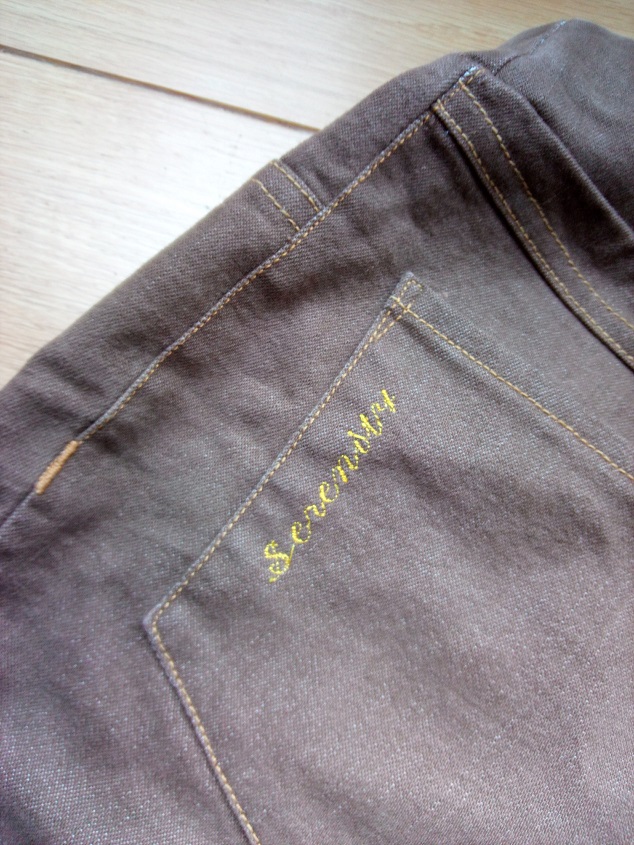
I like the inseam pockets. However, it was a mistake that I used the self fabric for pockets. Too bulky. I should have used the lining fabric. Also, the pocket pattern is basically a rectangle and I did not know what to do with it so it is sewn into the button hole and sewn with the button.


I cut a size S and graded up to size U only at the side seams.
The sleeves were WAY too long even for me who likes longer sleeves, so I shortened the upper sleeve piece by 2.5" (the sleeve has a horizontal seam line below the elbow). I also narrowed the sleeves a bit too.

It may be just a bit wider at the shoulder?


The pattern called for 6 buttons but I used only 5.
The button holes were the most difficult part of the sewing process. Because of the fabric was thick but stretchy (and only the facing was interfaced and too late to add a strip of interfacing on the back of the fashion fabric), my sewing machine had hard time sewing a nice satin stitch. I also decided to do a keyhole button hole and that made it even more difficult. I probably did at least 3 tries on each button hole (times 5).

So this is the completion of my Zoe costume (though a real Firefly fan would say Zoe must have her signature shotgun and the shotgun holster). It was definitely fun to plan and make the costume, but it was pushing for me to make 4 pieces of garment in one month.

May 30, 2017

Becoming Zoe 3: Self-Drafted Vest

ファイアーフライ宇宙大戦争のキャラ、ゾーイのコスプレ衣装三つ目は、ゾーイのトレードマークなベスト。


先日もちらっとお見せしましたが。もうこのベスト失敗したらゾーイじゃない、スーパーマンで言ったら彼の青いタイツぐらい、ゾーイのコスプレとしては重要なアイテムです。
そんな重要アイテムなのに、これっ!っていう型紙が見つからなくて、結局自分で型紙起こしました。カクっとまがったダーツがさ、難しいんだわ。
(ちなみにベルトはオットが毎日使っているベルトがゾーイのベルトにぴったりだったんだわ。)


The third item of my Firefly Zoe's costume is THE vest. Zoe's vest is like her uniform, like a black helmet for Darth Vader.

I could not find a good pattern so I ended up drafting a pattern from my sloper.


This is my toile #1. Someday, I will re-do my moulage to add more sway back so that I don't have to alter it when the toile is made up.


I drew in the style line change (narrower center front, wider and deeper neck opening, and narrower shoulder), and pinned the wrinkle at the back.


Toile #2. Better. Move on.


Obviously, I am not using leather for financial reason. I can't justify spending leather price for a costume that I will probably wear only once. I bought 1 meter of vinyl (because we just don't use yards in the U.K.) and I have plenty left over.


I used Bemberg rayon for lining. I wanted to top stitch the darts seams but Zoe's original vest did not have any top stitching other than the neck, side and hem, so I left it as is.

It was kind of fun to make the tiny belts for side closure. I did not know what to do with the ends that goes through the belt, so I cut it to shape and left it raw. The cut edge showed the white part of the vinyl so I colored it with a brown marker.


The seam line is basically a french dart meeting a waist dart. But Zoe's original vest has the pointy corner where the darts meet placed above and outside the bust point, which made it difficult to fit snugly like the real Zoe does. So that part does not fit perfectly.

I could not find any photos of the back of her vest, so I went the easy route and did a center back and princess seams to the shoulder.


I wore the vest all day at Comicon and it was actually pretty comfortable to wear. (The photo above, taken after the Comicon shows a belt mark at the waist) I was and I still am very excited about how the vest turned out and thinking that it was self-drafted makes me even prouder.

May 29, 2017

Becoming Zoe 2: Jalie 3461

ゾーイコスプレ衣装第2弾は、パンツ。

左から2番目がゾーイです
以前作ったピンクのシマウマパンツと同じ、カナダの会社Jalieの3461番を使いました。


ちなみになんで半ズボンなのかと言うとだね・・・。西部劇風の衣装だから、パンツの裾はブーツにイン、なのですが、私の足の太さでは裾をブーツインするとブーツのファスナーが上がらないのね(泣)だからブーツの高さに合わせて裾を切って、ブーツインに見える風。


伸びの少ない布を使ったので、パンツをオケツの上まで引っ張り上げるのに一苦労で、もうウェストの縫い目ほどけちゃってます。


Now onto my Zoe costume numero dos: the pants.
I used Jalie 3461 Eleonore pull-on jeans. This is my third Eleonore (the first was a pink zebra and the second was a more traditional denim look).


The fabric was supposedly stretch cotton drill with 3% spandex. However, it did not stretch as much as you would expect a 3% spandex would do... It BARELY stretched. I let out the waist band but I can do so much since it only had 3/8" seam allowance to begin with. The waist band side seams  are totally shredded now from trying to get in and out of the pants.


I only had the traced pattern (I bought a paper pattern and it's in the storage), which was already modified to size T at the waist, S at the knee, and 1/2" insertion added for full tummy.

Looking at my previous versions, which had wrinkles all over my back leg, I shortened the back leg by 2" right at under my crotch. Better now, but still got a lot of horizontal wrinkles under my butt.

I made the pants a capri length, but as I mentioned above, I don't have the original pattern so I'm not sure where my length falls onto.
I needed to make the "boots-in" look for Zoe, but thanks to my chunky calf, I can't pull my boots zipper up if I tried to "boots-in" my full length pants, so I cut off at 5" from the knee.

I machine embroidered "Serenity" (a name of a spaceship Zoe and the other main characters live and travel in) on my back pockets just for fun.


May 28, 2017

Becoming Zoe 1: Jalie 2562

コスプレデビュー果たしてきました。ま、その話は後で。

私のコスプレキャラは日本ではおそらくほとんど知られていない「ファイアーフライ 宇宙大戦争」というアメリカのドラマシリーズのキャラクターの、ゾーイ。
宇宙を舞台にしたSFなんだけど、西部劇風なの。お母さん、決してロビンフッドではありませんから(爆)


そんなコスプレの、シャツを作りました。
型紙はカナダの会社Jalieの2562番、ポロシャツ。


ニット生地で襟とか胸のあくところの細かい作業をするの、結構難しくって、そのへんあまりいい出来ではないのと、胸周りのサイズが合ってないのが気になるけど、コスプレ用には十分です。(ベスト着るから見えないし)


My cosplay debut is now over. I will talk about that later.
The character I chose for my cosplay was Zoe Washburne from the TV series "Firefly." It's not very well known in general public since the series was cancelled during the 1st season. I think the popularity caught up way after the series ended and they even made a movie. I did not know about it until it came on NetFlix.

Anyway, The first thing I made for Zoe's costume was the shirt, and I made Jalie 2562, a polo shirt.


I cut a size R, graded to size S at the waist. But I ended up taking in about 1/2" from underbust to hem. I also narrowed the sleeves by 1/2", and raised the armhole a bit.
As you can clearly see in the photo, I need to go up a size at the bust next time.


The shoulder seam stretched out a bit when I sewed it together first with my walking foot (before I attached a stabilizer) so it seems wide at the shoulder.
The back is a hot mess, as usual. It looks like I need to move the shoulder seem forward too, next time.


The fabric is a 100% cotton interlock. It has nice thickness to it and it is soft to wear.
I had difficulty sewing the collar and the front placket. Just too finicky to sew a precise corners with knit.

I need to work on the fit, but I like the overall design.

May 23, 2017

Becoming Zoe: Sneak Peak

今週末、コスプレデビューを狙っています。40だし、人生のいい節目に(爆)
ベスト作っちゃったもんね。自分のサイズから型紙起こしちゃったもんね。
ちなみにもちろん革ではなく、ビニール布(笑)


I am planning on my cosplay debut this weekend. A perfect milestone at age 40.
Zoe from Firefly, by the way.
I made her vest. I even drafted a pattern from my own sloper.
I hope that the vinyl smell will go away before Saturday.

May 17, 2017

WTF UK: Early Retirement

2月から、週に1度、街の無料消費者・福祉相談所みたいなところでボランティアをしています。あえて言うと無料法律相談所みたいな感じ。弁護士が法律の相談をするわけではないんだけど、相談役が各種生活保護や離婚、子供の親権問題、保険、債務、移民問題など多岐にわたる生活上の問題について一緒に解決策をさぐるサービスです。私はイギリスにいる期間も限られているので、事務やPR活動のアシスタントをしています。

慈善団体なので、基本的にボランティアで活動を賄っているわけなんだけど、何がびっくりするって、ボランティアの人々が、若い(笑)若いと言っても20代とかなわけではなく、完全に働き盛りな50台。中年男性多し。最初は、一体こんな週日の昼間にこの人たちはなんで会社にも行かずボランティアしてるんだろうと思ったほどよ。

よく聞くと、どうもこの働き盛りな年代の方たち、皆いわゆる早期退職組。50歳で会社を退職して隠居生活に入り、残った時間をボランティアして過ごしているらしい。

アメリカの、夫婦共働きで働き続けてやっと中流階級な暮らしができるのが普通な社会に慣れてしまうと、日本の「職業:主婦」人口の多さとか、こんなイギリスの早期退職組の多さにびっくりする。

大体、相談役のボランティアの人々は、ものすごく仕事熱心で、やってることの質から見たらお給料をもらえて当然の仕事。逆に慈善事業がボランティアにたよりきりでボランティアは搾取されてるぐらいなものよ。イギリスの個人収入はアメリカよりずっと低いのに、そんな早期退職して無償で働いてしまえる人が多いのはやっぱり社会主義制度が強いからなんだろうな。

やっと暖かくなって、庭の花も咲きだしました。


Since February, I have been going volunteering once a week at a charity organization where people can get free advice on wide variety of problems such as welfare, debt relief, divorce, child custody, immigration, etc. It is somewhat like a legal aid in the US, but instead of a license attorney giving legal advice, a trained lay person ("adviser") explain and explore the rights and options to resolve issues together with the clients. Since my time in the UK is limited, I do admin support and communication/PR support.

Because it is a charity organization, the funds are limited, and the daily operation is run mainly by the volunteers. What I was first surprised was seeing young people volunteering in a middle of the week day. When I say "young", I don't mean people in their 20s; rather, people in their 50s when they should be working at their regular job. Also, there were more men than typical volunteer force I'm used to seeing.

What I found out was that many of our volunteers are early retirees, who have retired from their regular job at age 50 so they spend their days volunteering.

In the US, we need 2 incomes in the household and need to keep putting money in the 401k and IRA and work way past age 60 to be able to maintain the middle class retirement. I have become so used to that life that now I get shocked by the number of stay-at-home wives in Japan and these people in England who can retire at 50 and have a middle class life.

I mean, these volunteer advisers do a pretty high level of work, for which they deserve to be paid. I sometimes even feel that the organization is exploiting the volunteers.

Individual income in the UK is much lower than that of the US, yet people here can retire that early and they are willing to work for free. While I respect capitalism, sometimes I envy the socialistic society.

May 13, 2017

Japan in London

ロンドンで見つけた日本。
大英博物館の「日本」コーナーで、縄文土器と一緒に手塚治虫の「三つ目がとおる」が飾られていた!(卓越した精密さで歴史的史跡が描かれている、というコメント付き)
すごいな、手塚先生、大英博物館にいるなんて。漫画の域を超えている。
あぁ、ブッダとか読みたいな(笑)最後に読んだの、中学生の時?
ちなみに「聖☆おにいさん」も飾られてたらしいよ。

A comic book by the legendary Osamu Tezuka was displayed at British Museum.
料理の鉄人の日本料理の鉄人森本が昔経営していたレストランチェーンのノブというレストランで昼食を食べました。
このお弁当一つ7千円ぐらい。おいしかったけど、7千円の価値は全然なかったと思う。サービスよくなかったし。高級レストランのくせにとても残念。

Lunch box at Nobu. Costs well over $60.
While it was good, it was NOT worth the price at all unfortunately. Sadly the service sub par as well.
チャイナタウンのパン屋さんによったら、トトロパン発見!ちなみにキティちゃんパンもあった。さすがに高価だったので買うのはあきらめたけど、レジで前にいたお姉さんがトトロパンとキティちゃんパンのセットを買っていた。ちなみに私はアンパンとクリームパンとロールケーキを買いました。

Totoro bread at a bakery in China Town. They also had Hello Kitty bread too. Pricey, but cute to look at.

May 10, 2017

Backpack Chronicle 8 Encore

パイピングのついてないバージョンのリュックサックが完成したので、無理やりユキにモデルになってもらいました。
縫い代の始末をするのに手縫い作業が多かったので、YouTubeでロングバケーション全11話を見ながら作業しました。
みなみ~、せ~な~、ですよ。


My second backpack without piping has been completed. Dog has graciously (and reluctantly) modeled it for me. It fits her rather well, I would say.

May 9, 2017

WTF UK: Pricey Krispy Kreme

日本のクリスピークリーム(ドーナツ)もアメリカの4割増しぐらいの高値で売られていてびっくりするけど(1個140円?)、イギリスのクリスピークリームはもっと高かった!(1個213円)。その上小さい。


I was surprised how expensive Krispy Kreme was in Japan (about $1.20), but it is even more expensive in England. Whopping $1.80. And it is about 20% smaller.

May 3, 2017

Backpack Chronicle 7 Finale

リュックサック、一つ完成した。
とてもよく頑張って作ったし、出来栄えも悪くはないとは思うんだけど、「あぁすればよかったな、こうすればよかったな」と思うところが多く、手放しで喜べないところです。
ボクシングで言うとノックアウトではなくて、判定勝ち、な感じ。いや、何に勝ってるわけでもないんだけど。
いや、でも出来はそれなりにいいとは思うのよ。既製品ほどうまくできてなくて嫌なだけ。


My backpack has been completed.

I did my best and I think I did ok; it has turned out the way I envisioned it. However, there are so many things that with a hindsight I'm thinking "I should have done this, should have done that" that I can't really embrace it as an accomplishment. It feels like winning a boxing match with technical knockout rather than a clean KO.

I mean, it's ok enough; it's just not enough to beat the manufactured ones.


Anyway, here is my project summary:

The pattern is The Essential Backpack by Annie Unrein (byAnnie). According to her website, it's basically the same as her Back At Ya Mini Backpack Purse with slight instructional difference. I bought her Craftsy class, Sew Sturdy: The Essential Backpack.

The Craftsy class is great, as is her other Craftsy classes. I also have her travel organizer class, and her method for backpack is pretty similar. Basically, very quilter friendly.

The bag dimension is about 10" wide at the bottom, tapering towards the top, and 12" tall.

The bag has front exterior pocket with a pocket flat with magnetic snap closure.


The original instruction called for credit card pockets inside the front pocket, but I don't see myself putting credit cards in the front pocket so I just made a slip pocket divided into pen slots and a smaller pocket slot.


The back has a zippered pocket.

Hindsight #1: I wish I had covered the zipper ends for clean finish at the sides where the zipper meats the side panel. Because you sew the back panel first as a rectangular, then trim the tapering at the end, I did not think about it.

Hindsight #2: the back panel is basically 2 panels of exterior fabric (with fusible interfacing)/Soft & Stable (spongy interfacing)/interior fabric: 1 panel for the pocket, and 1 panel for the actual back panel. While the double layer make the bag very sturdy, it was very thick. I had to give up on the piping here because the seam, especially where the bottom strap is sewn, was about 1/2" thick and did not fit under the pressor foot. I could have made the pocket as a zippered welt pocket without the Soft & Stable to reduce the bulk.


The strap has a poly webbing inside so it has a nice body to it. The top grab handle is padded with Soft & Stable but I could have gotten away with just using the same covered webbing instead?

The inside has zippered mesh pocket on the front side, and a slip pocket on the back side.


Hindsight #3: While I love the mesh pocket idea, it is slightly awkward to use it since the zipper is towards the top. I might want to lower the zipper position a couple of inches.

I added a mesh pocket for a water bottle.


Because the original instruction is meant for quilting the exterior and the interior fabric together before construction, the instruction calls for the panels to be sewn right sides together, and the raw edges are covered with a bias binding.

Hindsight #4: Since I did not quilt the fabric, I could have sewn the interior and exterior fabric separately and bagged them.

My raw edges are covered with 1" twill tape. There was no way of this thick seams to go under the pressor foot, so I hand-stitched the twill tape entirely (while watching YouTube rabbit hole).


I also added a strip of fabric that covers the main zipper opening. I like how it looks, but slightly too tight around the corner (thanks to the very stiff piping) to open the zipper.

I added a piping at the front and the pocket flap.

My exterior fabric is John Lewis upholstery fabric, and the interior is Ripstop.

The pattern is made with 1/4" seam allowance. While it worked fine with assembling the parts, because of the thickness of my material, I had to sew with 3/8" SA to assemble the front and back panel with the side panel. My zipper foot was sliding off the edge if I tried 1/4" SA.

Overall, it's a pretty good pattern for a nice small backpack, and the Craftsy class was very enjoyable to watch. If you like Vera Bradley, this is it.

My lack of enthusiasm about the finished bag is mostly coming from the user error; I should have thought better considering the different kind of material I was using and the different look I was after. I actually had joined the bag contest on Pattern Review when I started this project and now I am debating if I should enter this bag... I have to sleep on it.

May 1, 2017

Backpack Chronicle 6

リュックサック製作、終わり近し!
底にあたるところにシリアルの箱を入れて縫った後に最後の組み立て作業に入ったら、どう頑張ってもコーナー周りでうまくミシンの下にリュックを通すことができなくて、結局底に厚紙を入れるのはあきらめました。
もっすごいオケツに汗のかく作業です。


The end is near with my backpack progress.
I sewed down the bottom part with a cardboard piece before I began assembling. However, I was not able to maneuver the bottom part with the stiff bottom while sewing the corner, so I had to ditch the stiff bottom idea.
I am sweating my butt off.